BEFORE YOU BUILD
Use this work at your own risk
These files have not been checked for accuracy, safety, structural adequacy, or building-code compliance. They may contain serious errors and are not construction-ready. Obtain independent qualified design and review before building.
No person or organization makes any guarantee or warranty, express or implied, regarding this design, its documentation, digital files, or website views. They are not professional services and do not create an architect-client or other professional-client relationship. No promise is made about accuracy, completeness, reliability, code compliance, or fitness for your project.
Buildings and building projects are complex, and many things can go wrong. You are responsible for checking dimensions and site conditions, choosing suitable materials and methods, obtaining permits, following codes and manufacturer instructions, and getting qualified professional help when needed. To the fullest extent permitted by law, DIYPlans.org disclaims liability for damages resulting from use of this work. Read the FAQ about your responsibilities.
Instructions
Step 1 Lay out the cedar
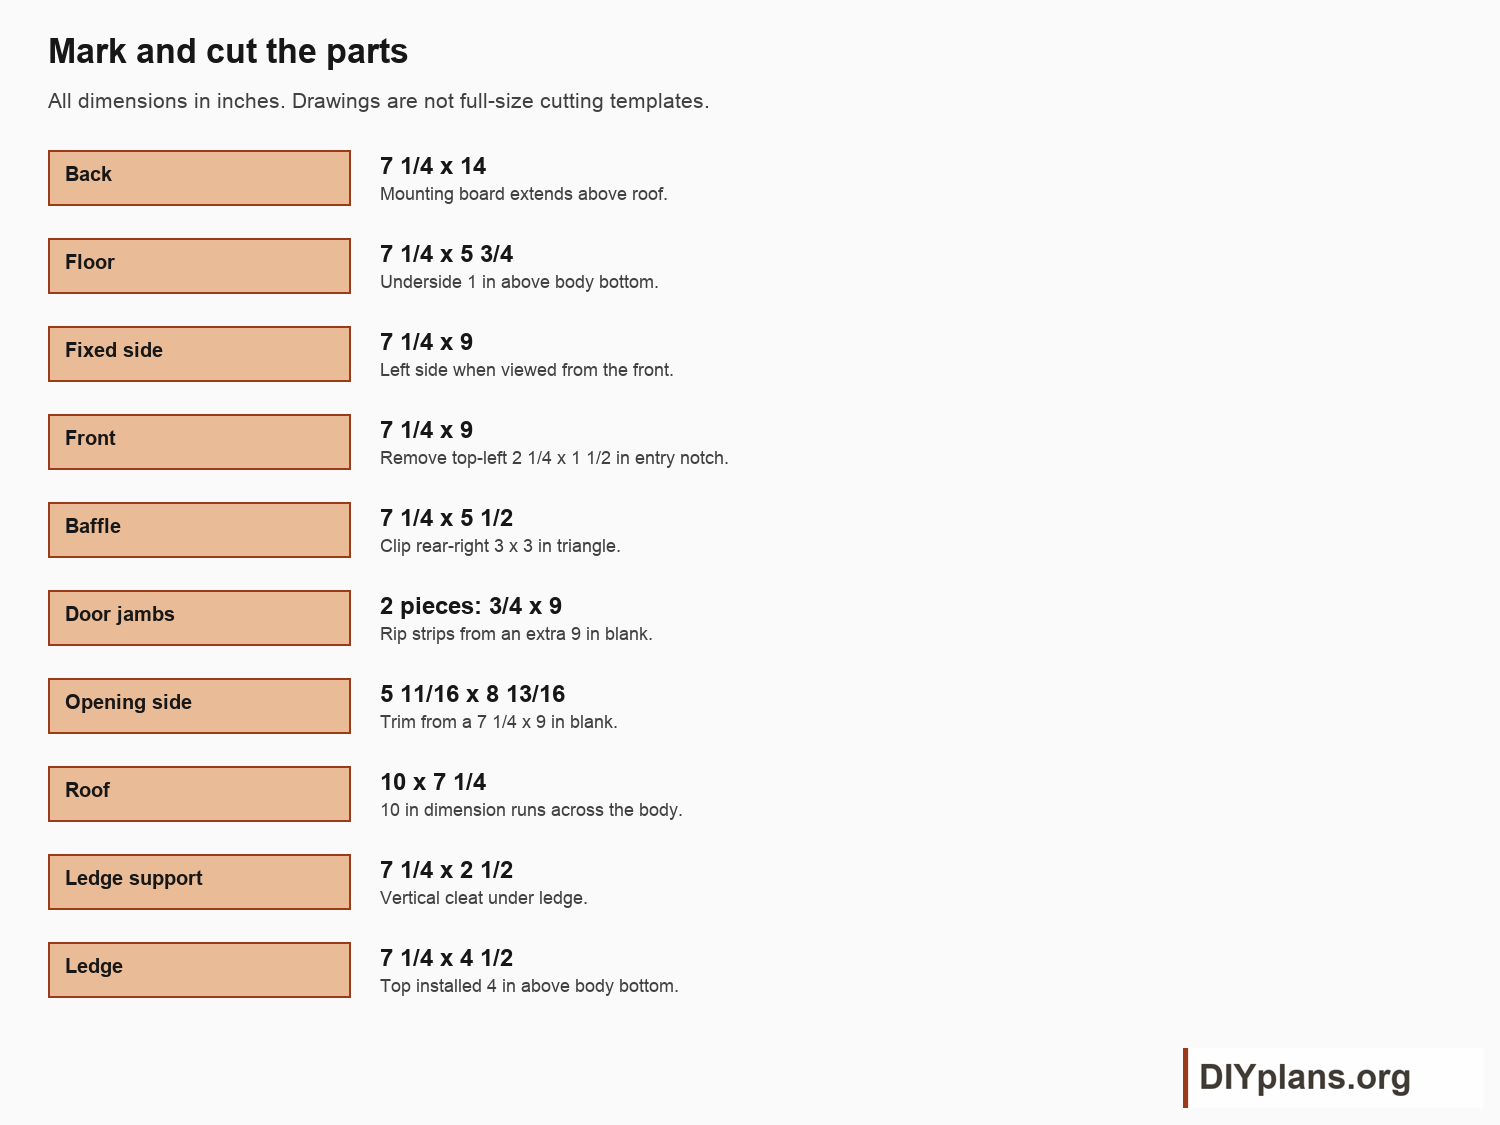
- Crosscut the full-width pieces from the cut list and an extra 9 in blank for the two narrow door jambs.
- Allow 1/8 in per saw cut.
- Rip the two jambs 3/4 in wide. Trim the door to 5 11/16 in deep and 8 13/16 in high.
- Label the front, back, fixed left side, opening right side, floor, baffle, roof, support and ledge.
Check: All parts are labeled and the moving door measures 5 11/16 in deep by 8 13/16 in high.
Step 2 Cut the entry and baffle notch
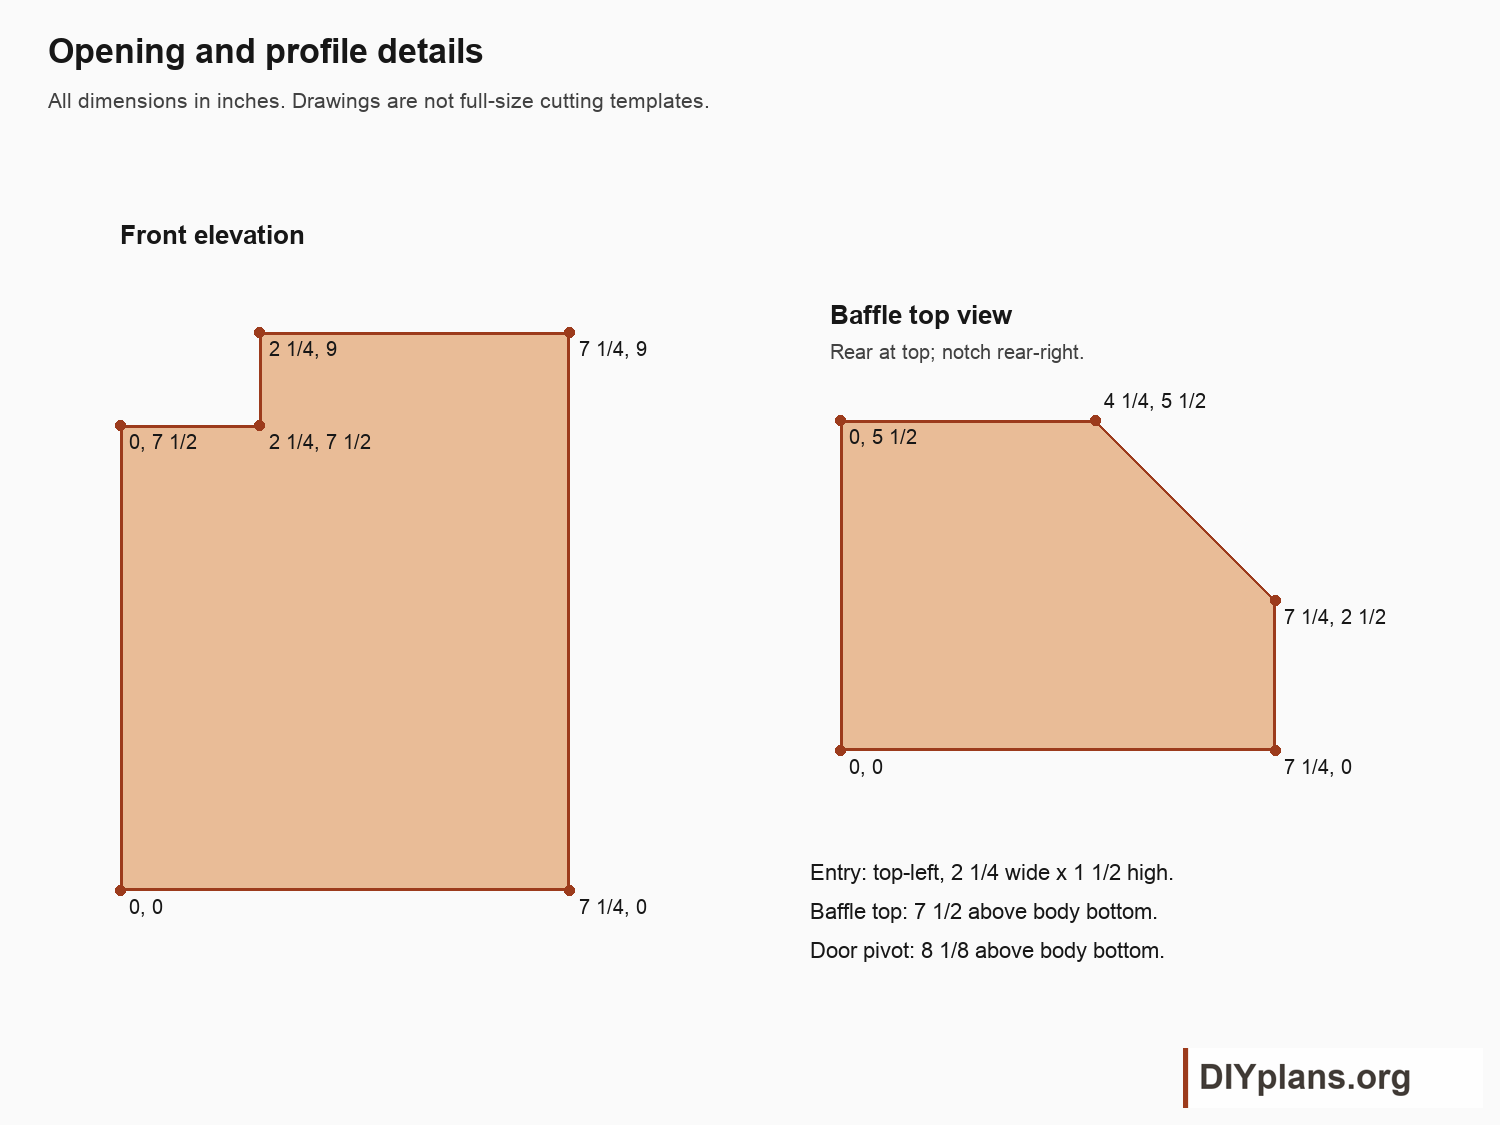
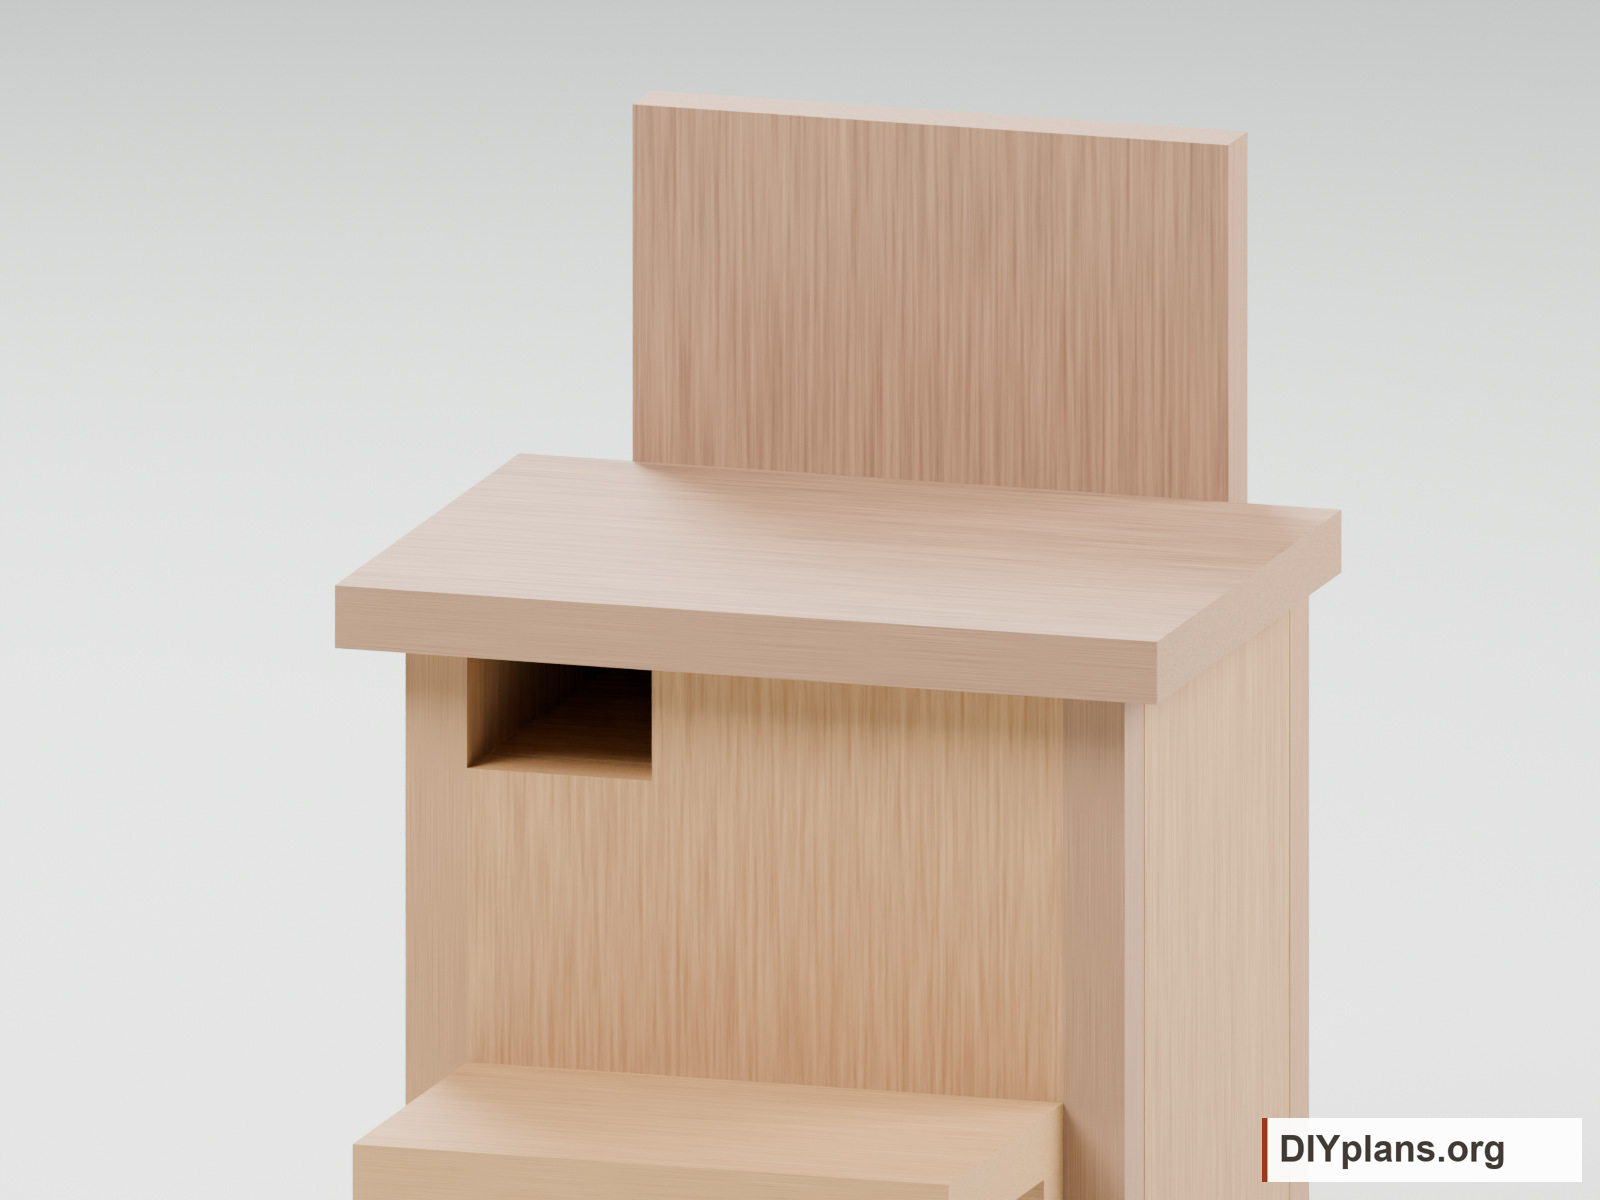
- Remove a 2 1/4 in wide x 1 1/2 in high rectangle from the front top-left corner.
- Clip a 3 x 3 in triangle from the baffle rear-right corner. This opening must be diagonally opposite the entry.
- Ease rough cut edges without enlarging the entry. Leave the chamber unfinished.
Check: The front entry and baffle notch are diagonally opposite, with smooth edges and unchanged opening sizes.
Step 3 Join the floor, back and fixed side
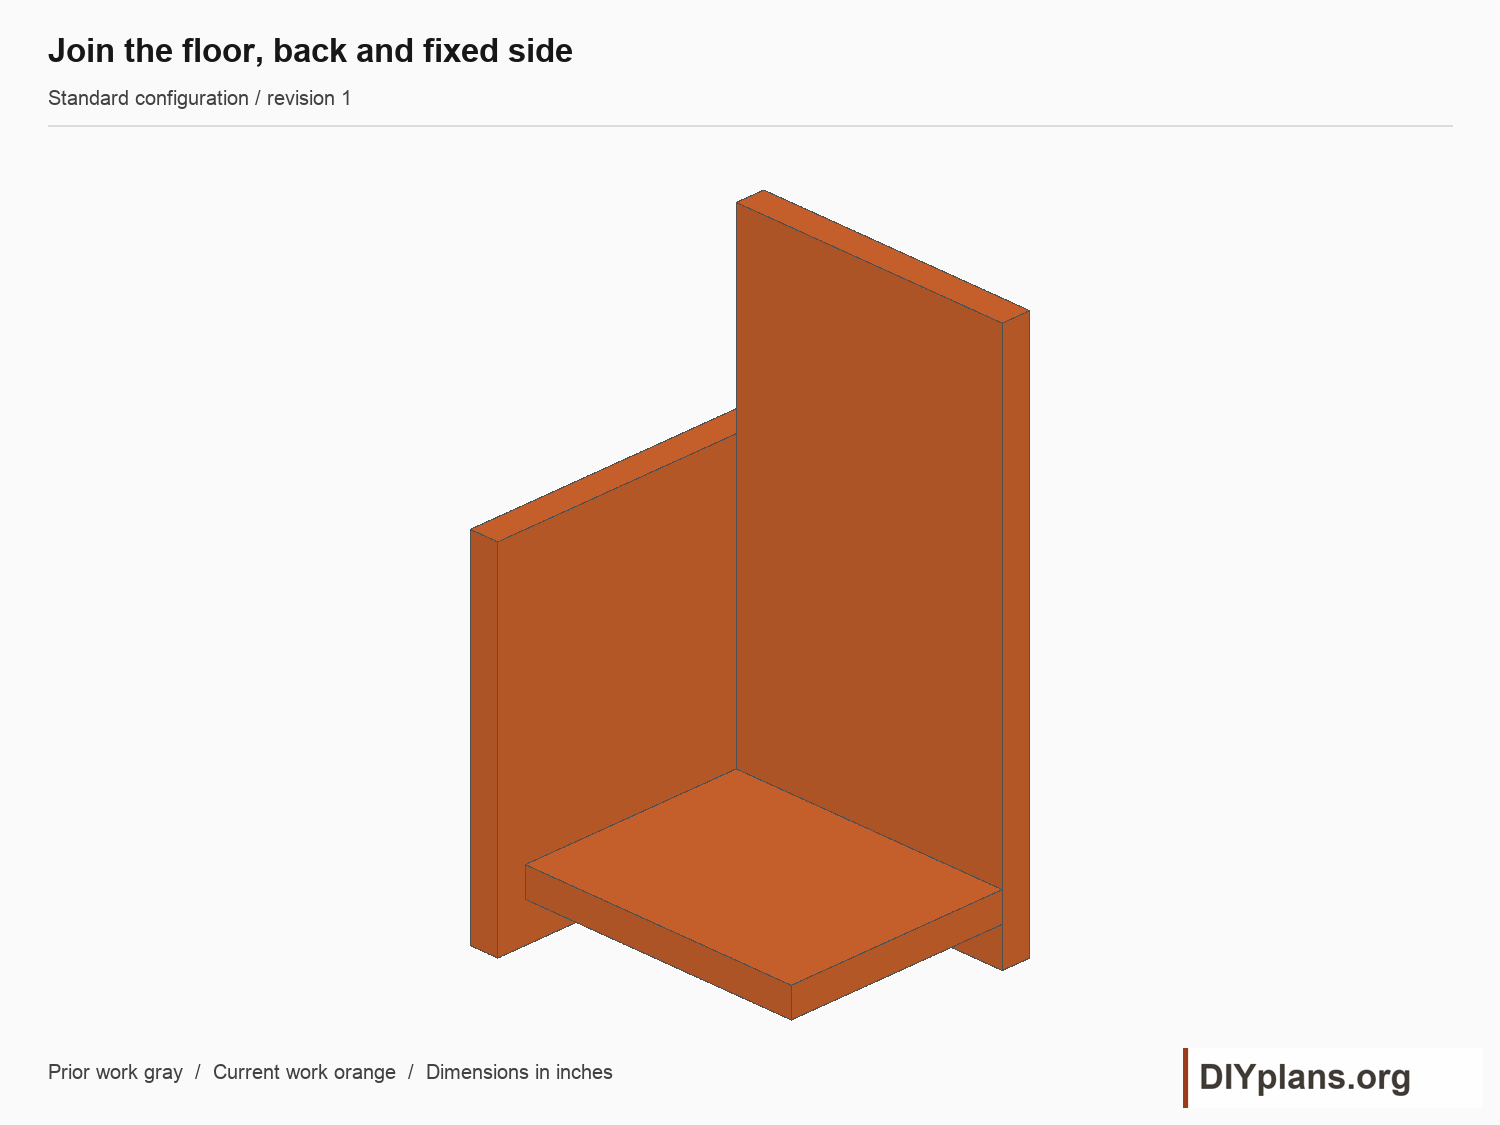
- Mark the floor underside 1 in above the body bottom. Fit its 7 1/4 in width between the two side positions and its 5 3/4 in depth between front and back.
- Fix the floor to the back with two screws through the back. Fix the left side to the floor with two screws and to the back with two screws.
- Predrill every edge joint. Check the body depth will be 7 1/4 in and the outside width 8 3/4 in.
Check: The floor and fixed walls are square, giving a 7 1/4 in body depth and 8 3/4 in outside width.
Step 4 Fit the front and baffle
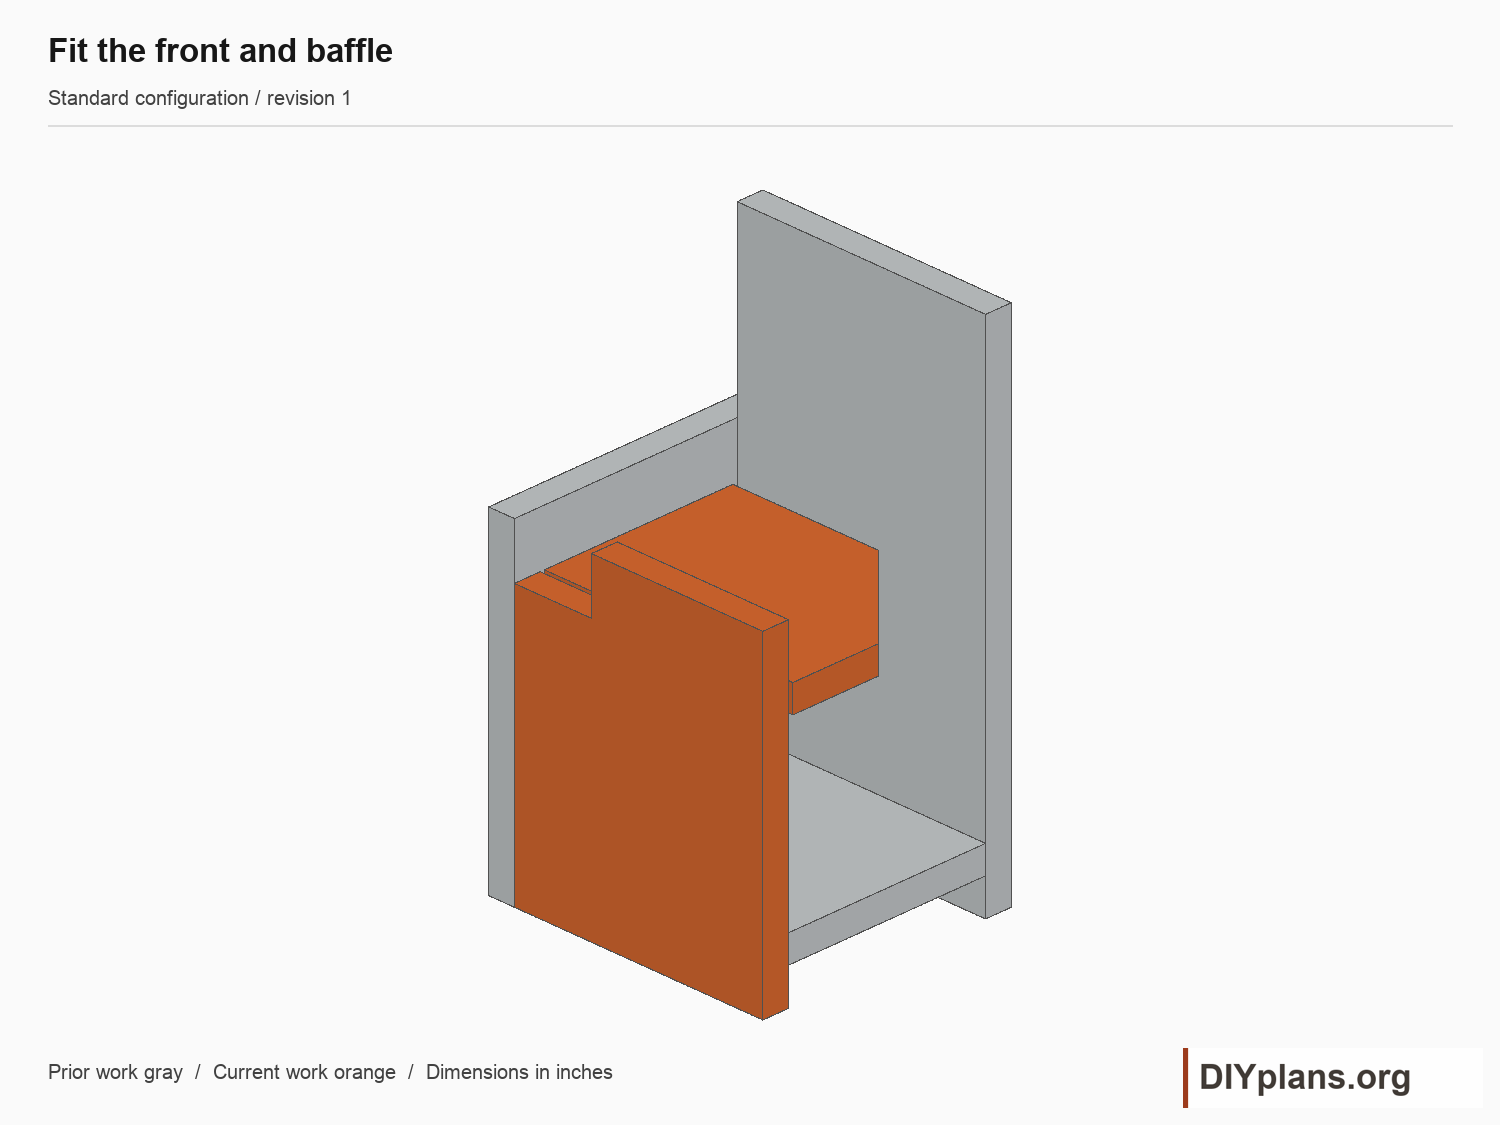
- Attach the front between the side positions, flush with the side bottom. Use two screws into the floor and two into the fixed side.
- Install the baffle with its top 7 1/2 in above the body bottom. Center its 5 1/2 in depth between front and back, leaving 1/8 in at each end.
- Fasten the baffle through the left side with two screws. Add one screw through the front and one through the back into sound baffle edges, avoiding the entry and triangular notch.
Check: The baffle top is 7 1/2 in above the body bottom, with 1/8 in clearance at its front and rear.
Step 5 Add the door jambs
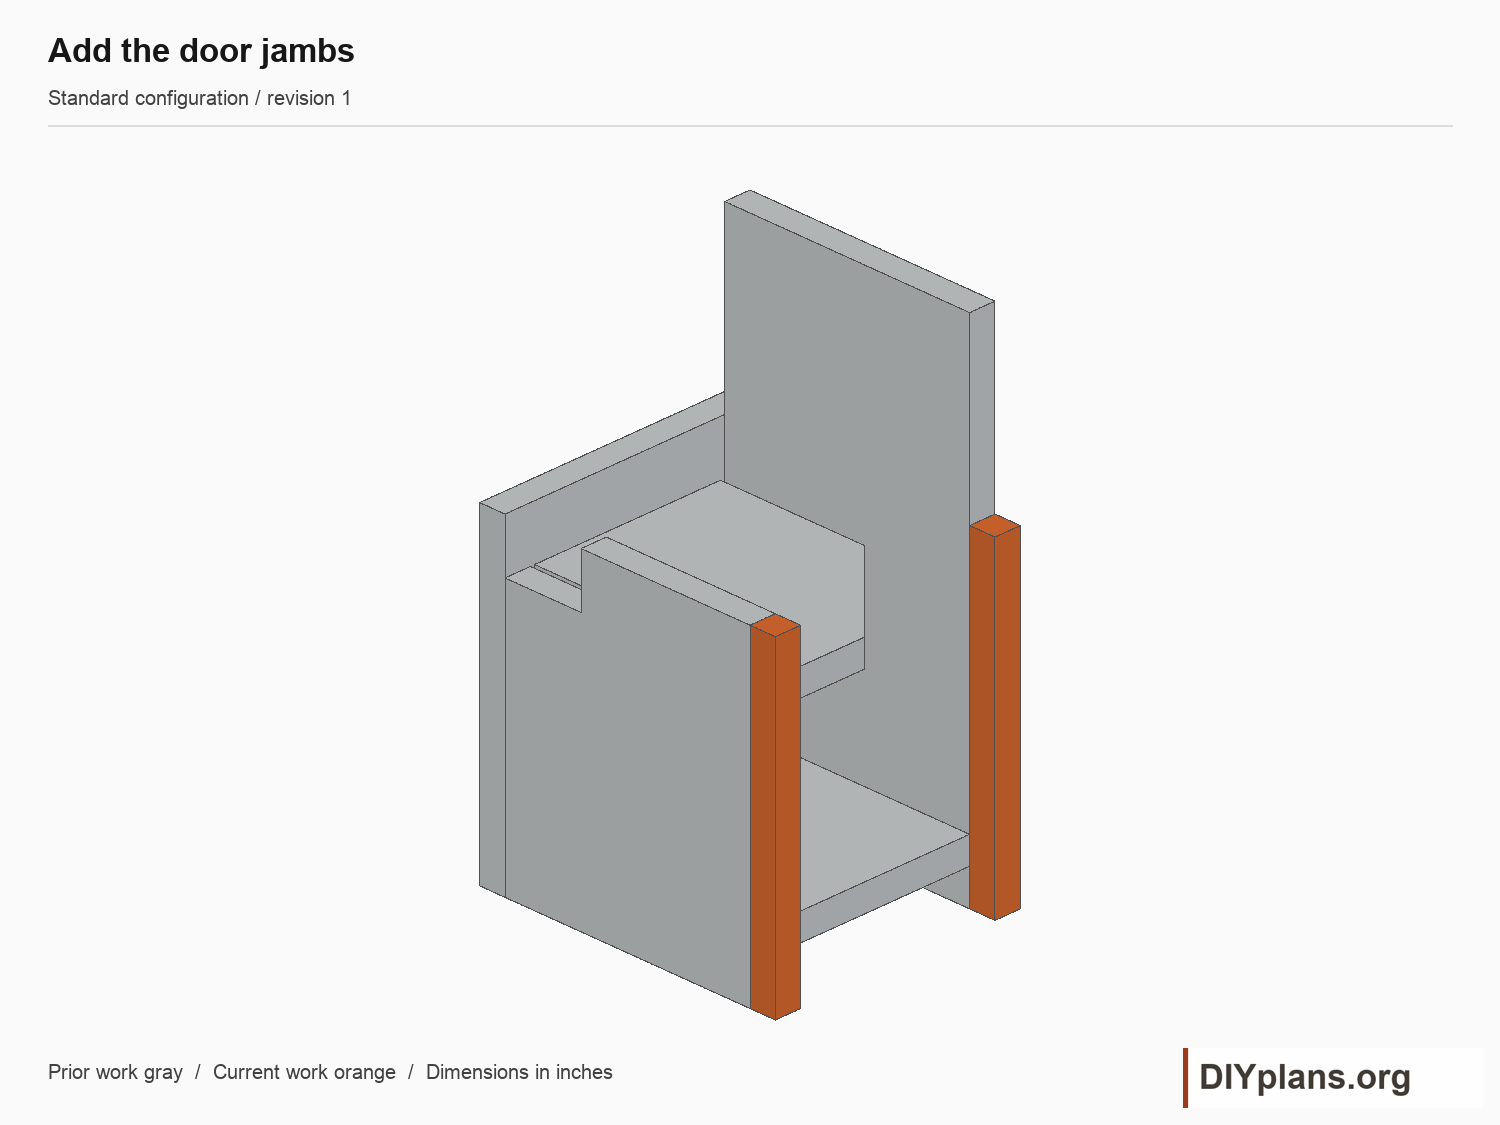
- Fit one 3/4 in wide jamb outside the right edge of the front and one outside the right edge of the back.
- Keep their bottoms flush.
- Attach each jamb with two screws into the adjacent front or back edge. Keep the screws away from the pivot height.
- Check the clear depth between the jambs is 5 3/4 in. The trimmed door must leave 1/32 in at each end.
Check: The jamb opening is 5 3/4 in deep, leaving 1/32 in at each end of the trimmed door.
Step 6 Hang the cleaning side
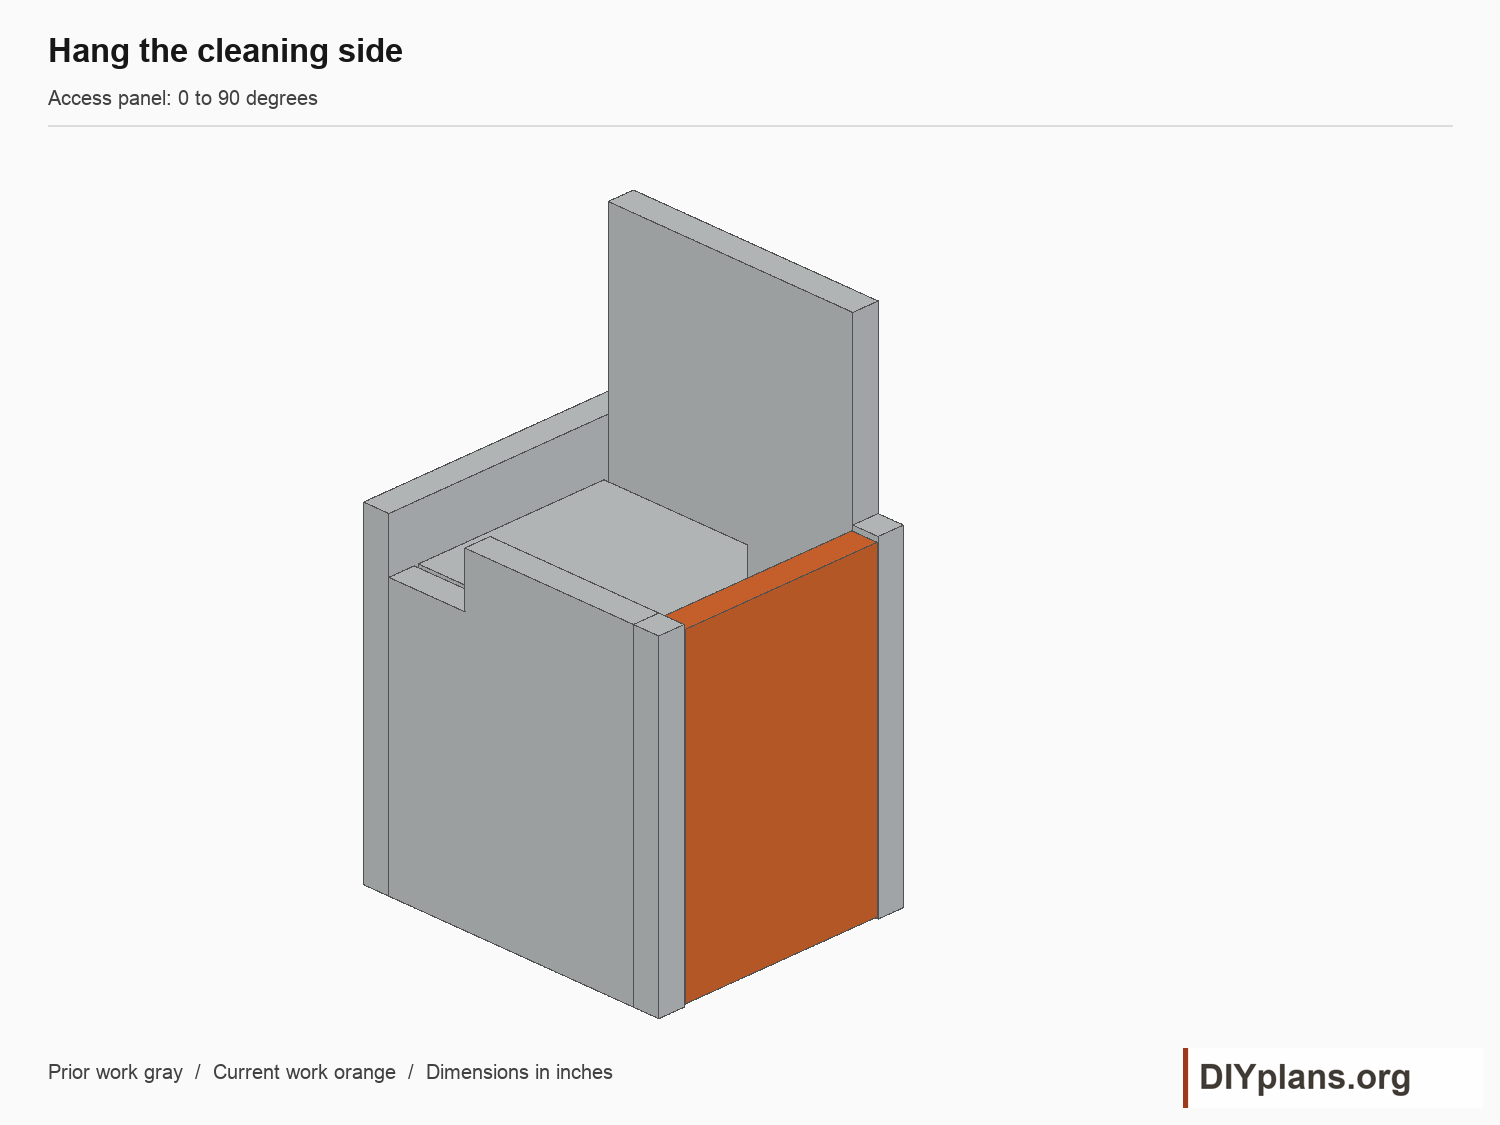
Play animationStop animation
 Loading image
 Loading image
- Hold the door with its bottom 1/16 in above the body bottom and its top 1/8 in below the 9 in wall line.
- Drill aligned pivot pilots through the two jambs into the door ends, 8 1/8 in above the body bottom and centered through the 3/4 in door thickness.
- Install two 1 1/4 in pivot screws, leaving enough freedom to turn. Open to 90 degrees and check clearance at the floor and baffle. Add a removable closure screw through the door into the floor edge at 1 3/8 in height.
Check: The door swings through 90 degrees without touching the floor or baffle, and the closure screw secures it shut.
Step 7 Attach the ledge and support
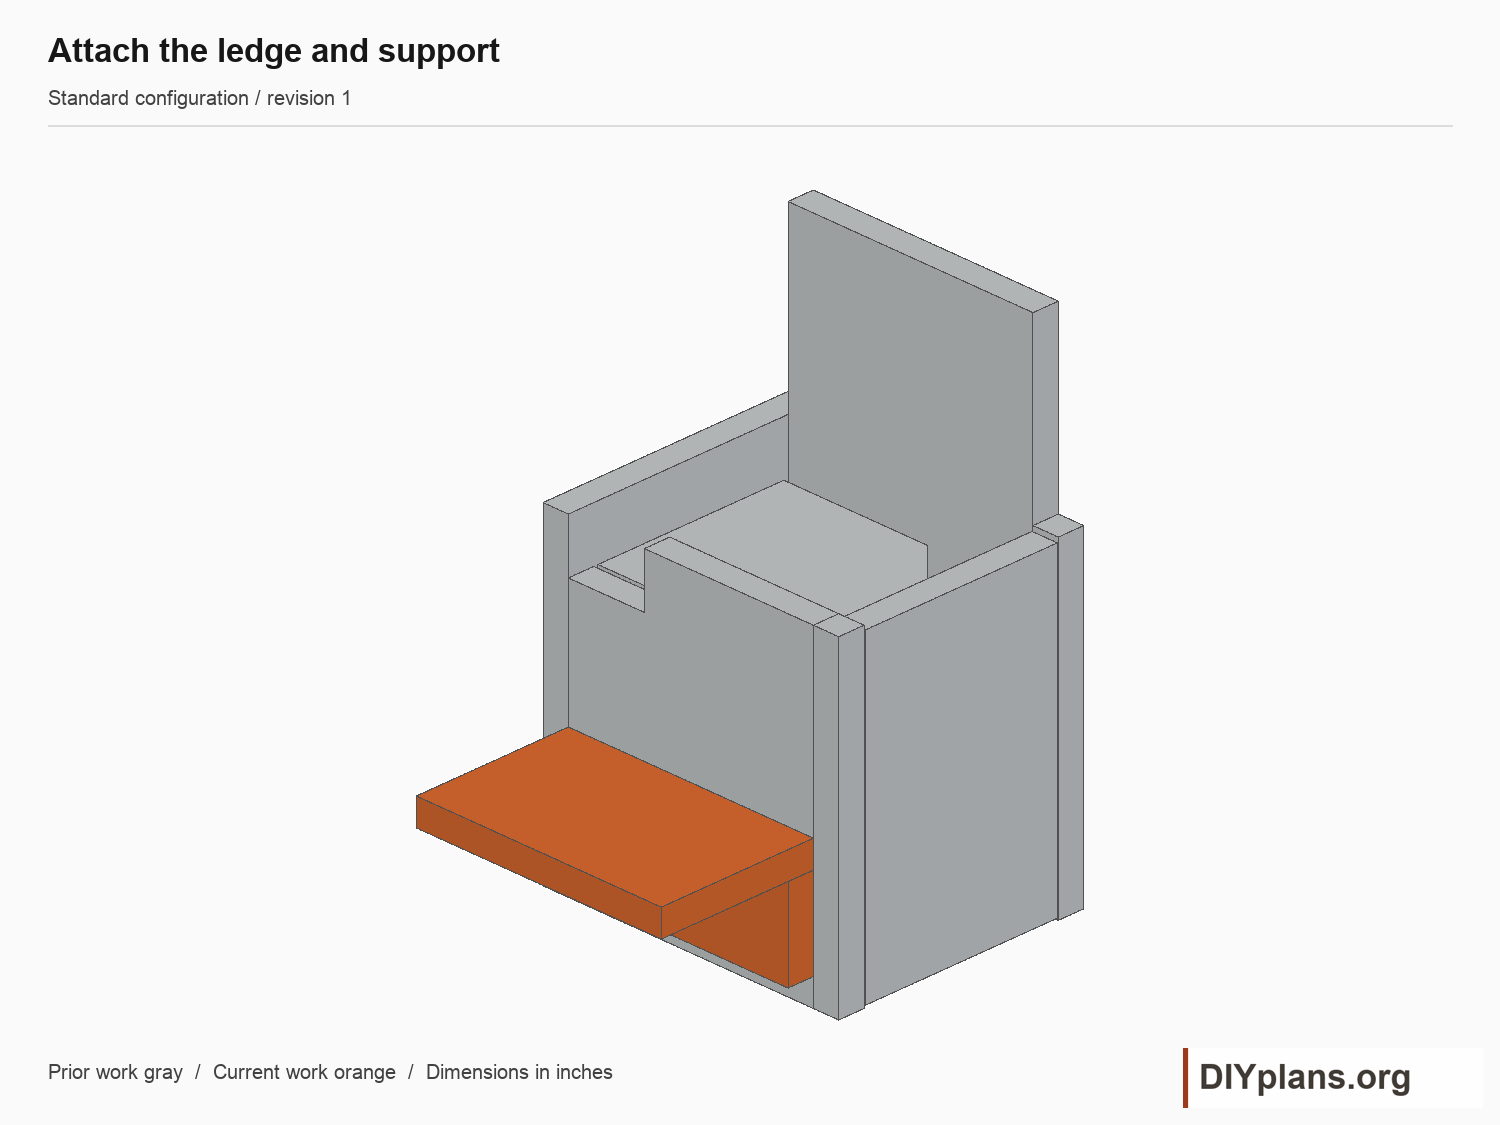
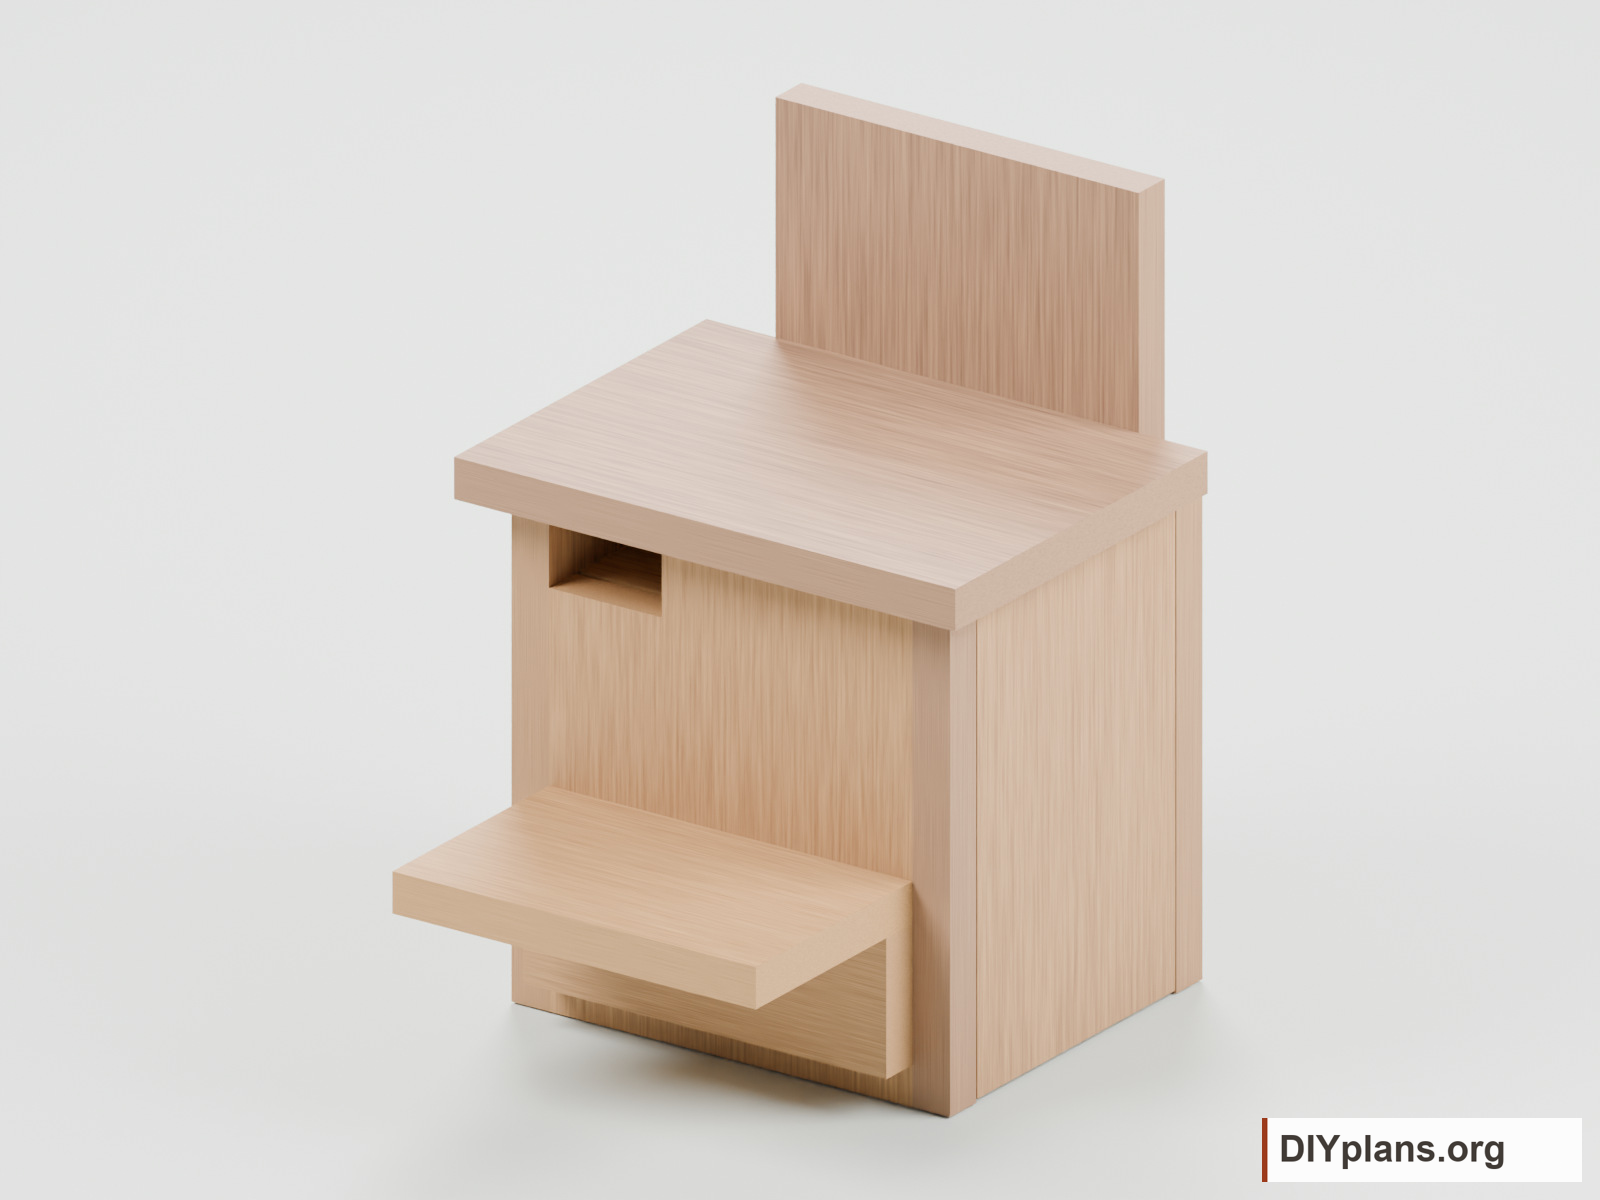
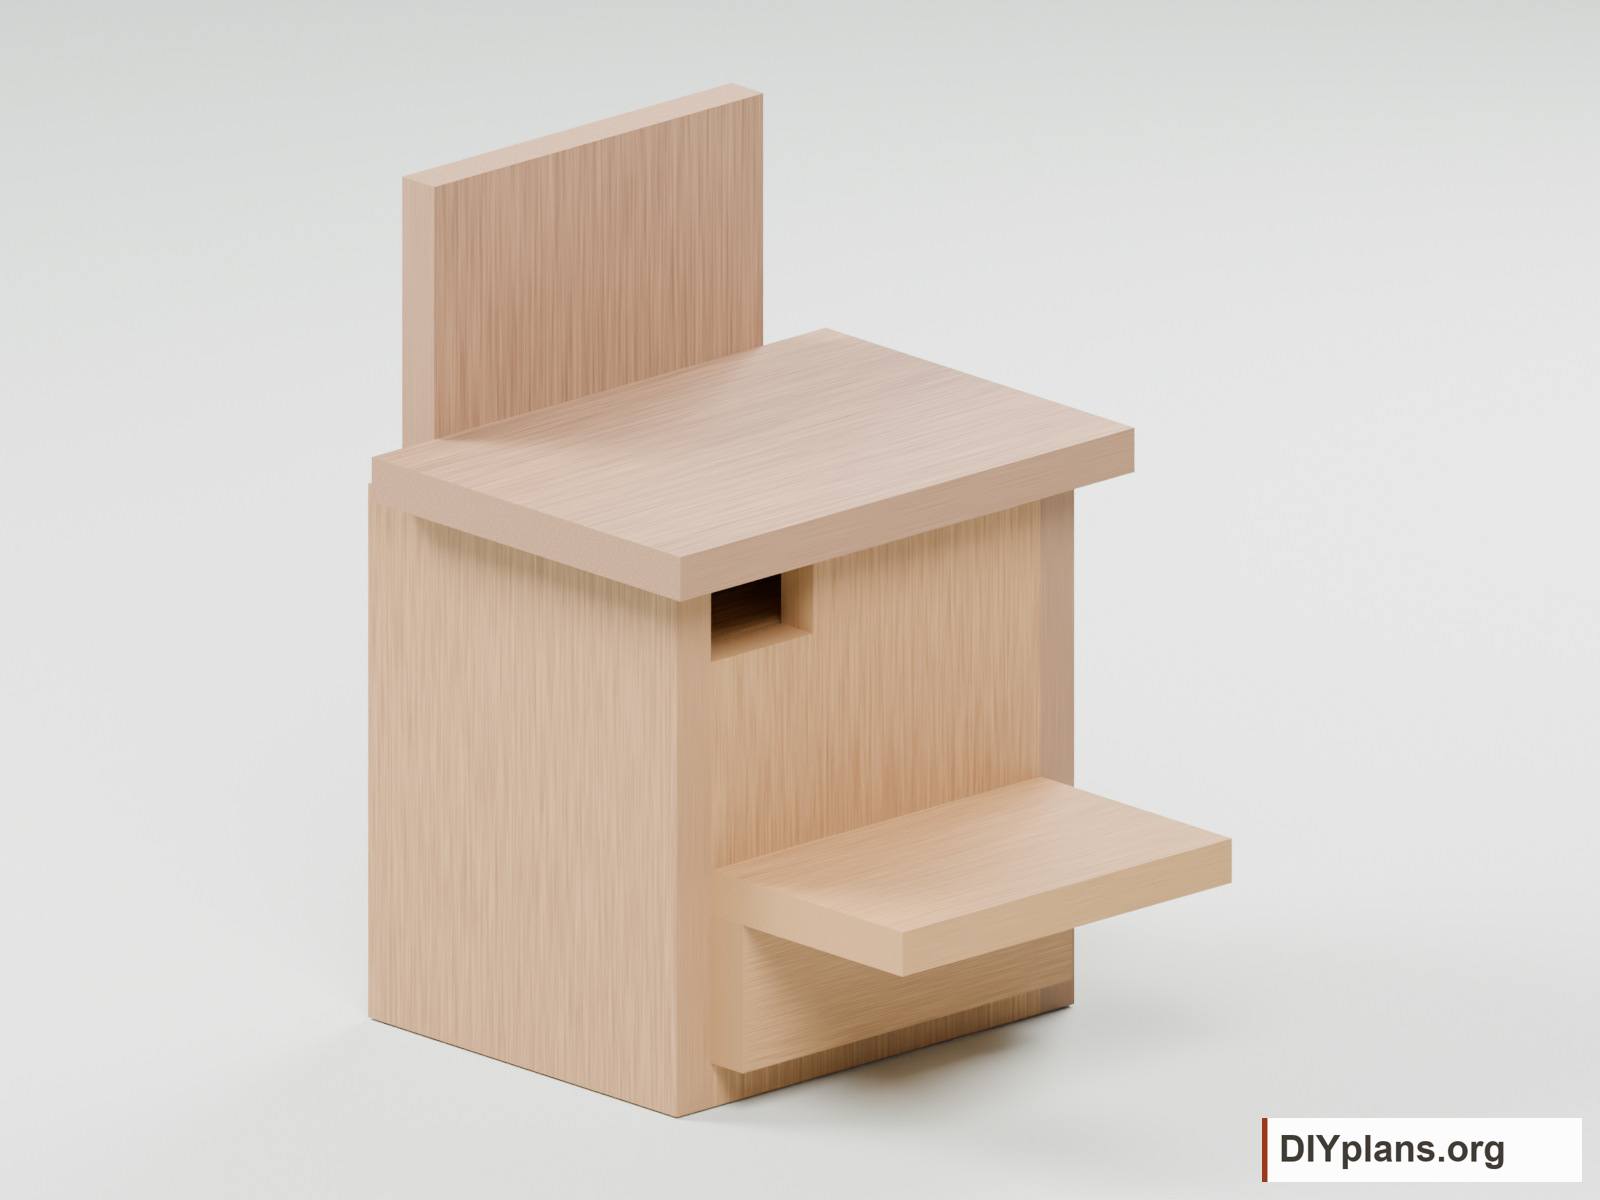
- Fix the 2 1/2 in high support cleat to the outside of the front, with its bottom 3/4 in above the body bottom.
- Use two screws.
- Lay the 4 1/2 in deep ledge on the cleat, with its back edge against the front. Its top must be 4 in above the body bottom.
- Drive two screws down through the ledge into the cleat and two through the front into the ledge rear edge.
- Keep all tips within the wood.
Check: The ledge top is 4 in above the body bottom, the cleat supports it, and screw tips stay within the wood.
Step 8 Fit the roof and mount the box
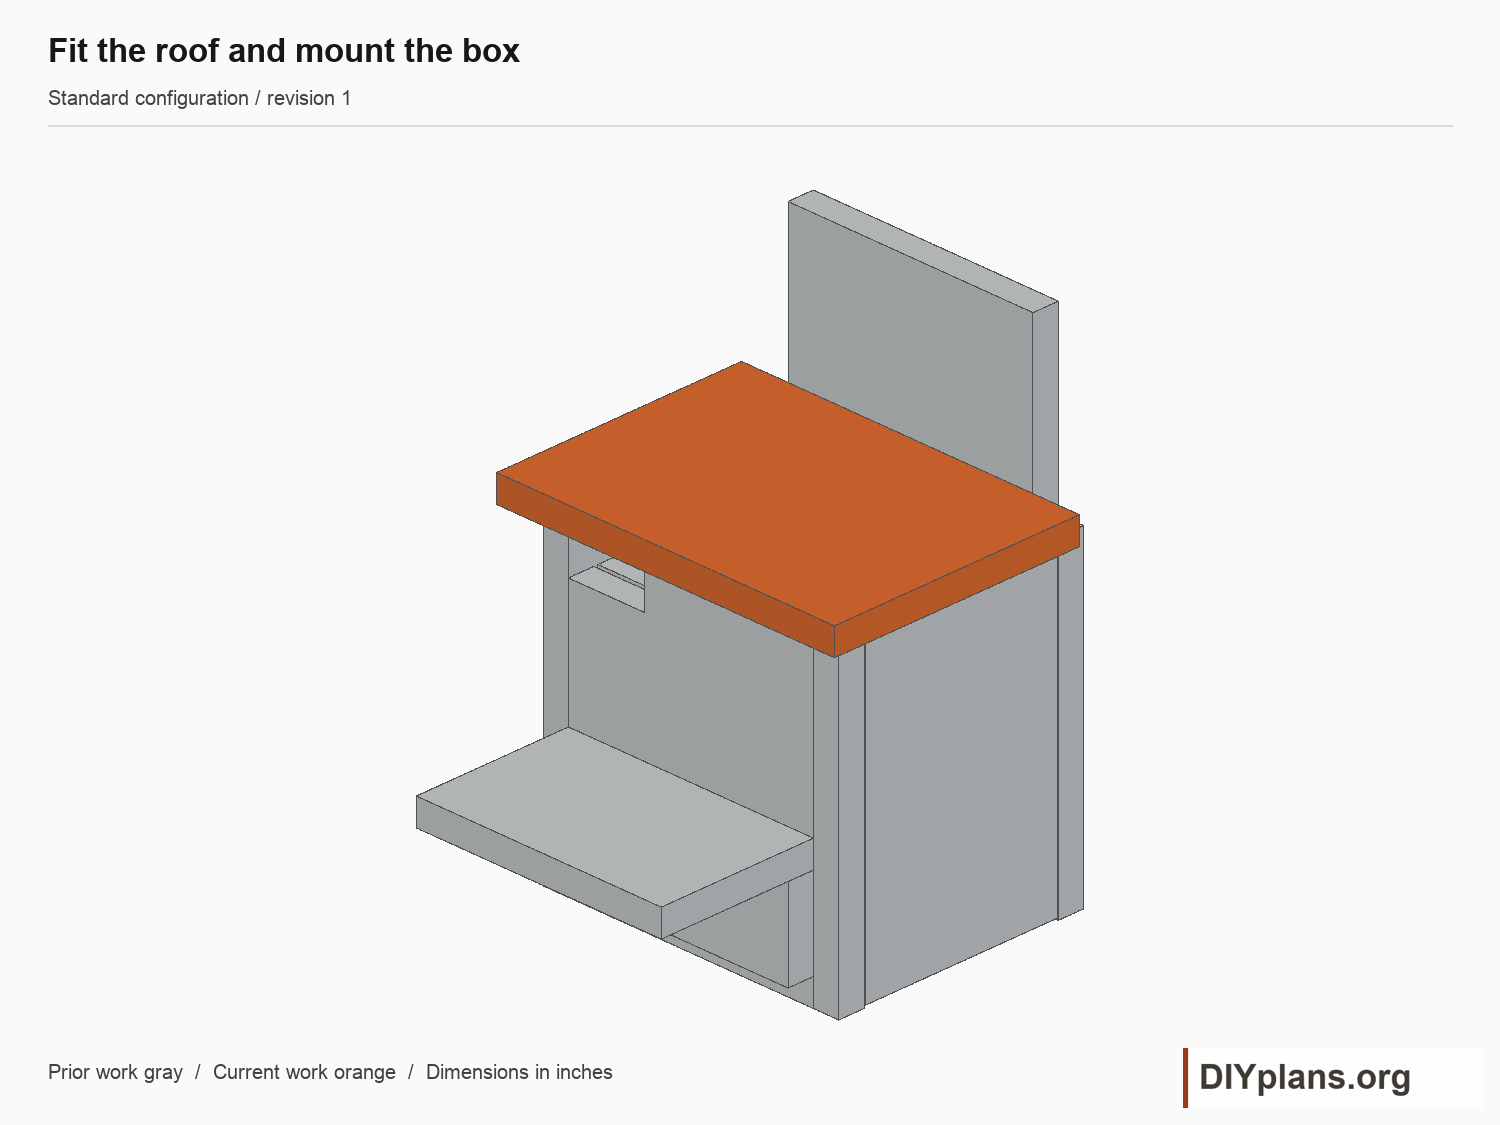
- Center the 10 in roof across the 8 3/4 in body. Put its rear edge against the back face; its front projects 3/4 in beyond the front.
- Use two screws into the fixed side, one into the front right of the entry and one into the rear door jamb.
- Keep the opening side free.
- Drill mounting holes in the back above the roof and select fasteners for a sound tree, post or other support.
- Keep the entry clear and preserve access to the closure screw. Check the door again and inspect only when the nest is unoccupied.
Check: The roof is secure, the entry remains clear, and the cleaning door opens after mounting.
Sources
Functional dimensions informed by the cited Washington Department of Fish and Wildlife woodworking sheet. CAD, instructions, schedules and illustrations authored for DIY Plans.