
BEFORE YOU BUILD
Use this work at your own risk
These files have not been checked for accuracy, safety, structural adequacy, or building-code compliance. They may contain serious errors and are not construction-ready. Obtain independent qualified design and review before building.
No person or organization makes any guarantee or warranty, express or implied, regarding this design, its documentation, digital files, or website views. They are not professional services and do not create an architect-client or other professional-client relationship. No promise is made about accuracy, completeness, reliability, code compliance, or fitness for your project.
Buildings and building projects are complex, and many things can go wrong. You are responsible for checking dimensions and site conditions, choosing suitable materials and methods, obtaining permits, following codes and manufacturer instructions, and getting qualified professional help when needed. To the fullest extent permitted by law, DIYPlans.org disclaims liability for damages resulting from use of this work. Read the FAQ about your responsibilities.
Instructions
Step 1 Check plywood and mounting access
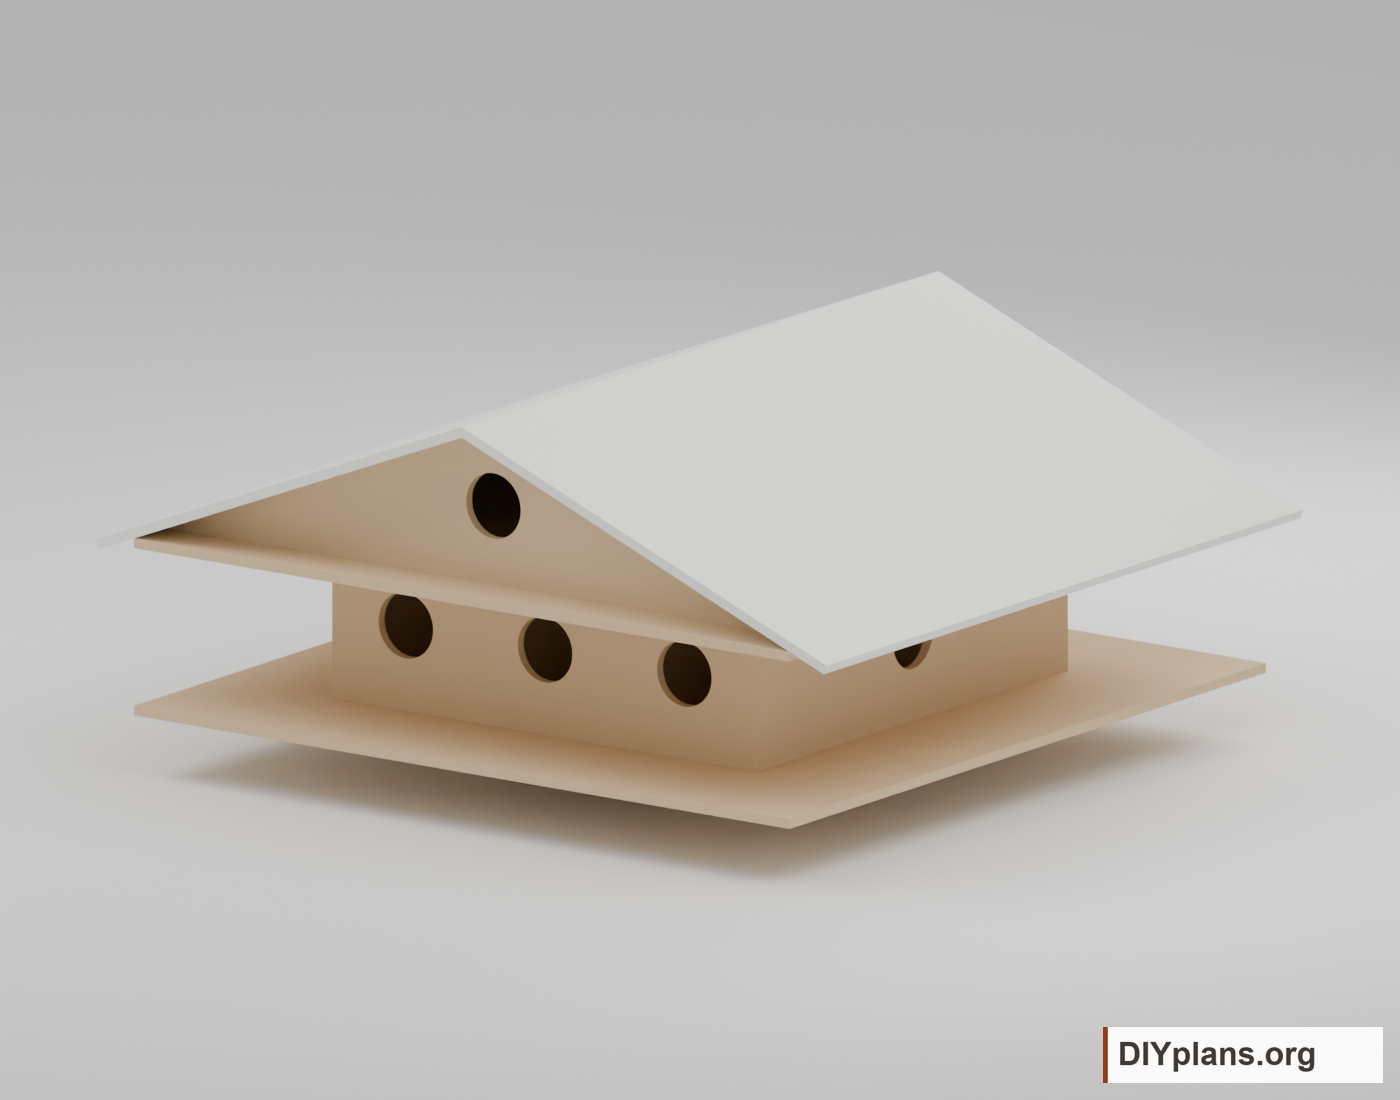
- Measure the plywood before laying out joints; it must be 3/8 inch thick. Confirm the 6-inch rooms and 2-1/2-inch entrances suit the intended use. Plan secure mounting and access for cleaning before buying support hardware.
Check: Plywood measures 3/8 in and the mounting and cleaning-access requirements are understood.
Step 2 Cut the flat panels

- Follow the two-sheet cutting layout, leaving a 1/8-inch saw kerf between parts. Cut each 30-inch square floor and the roof base, then cut a centered 6-inch square air opening. Its edges are 12 inches from the panel edges. Keep the two 12-inch mounting plates solid.
Check: Flat panels match the cut list; floor and roof-base air openings are centered and clear.
Step 3 Cut walls and half-lap joints
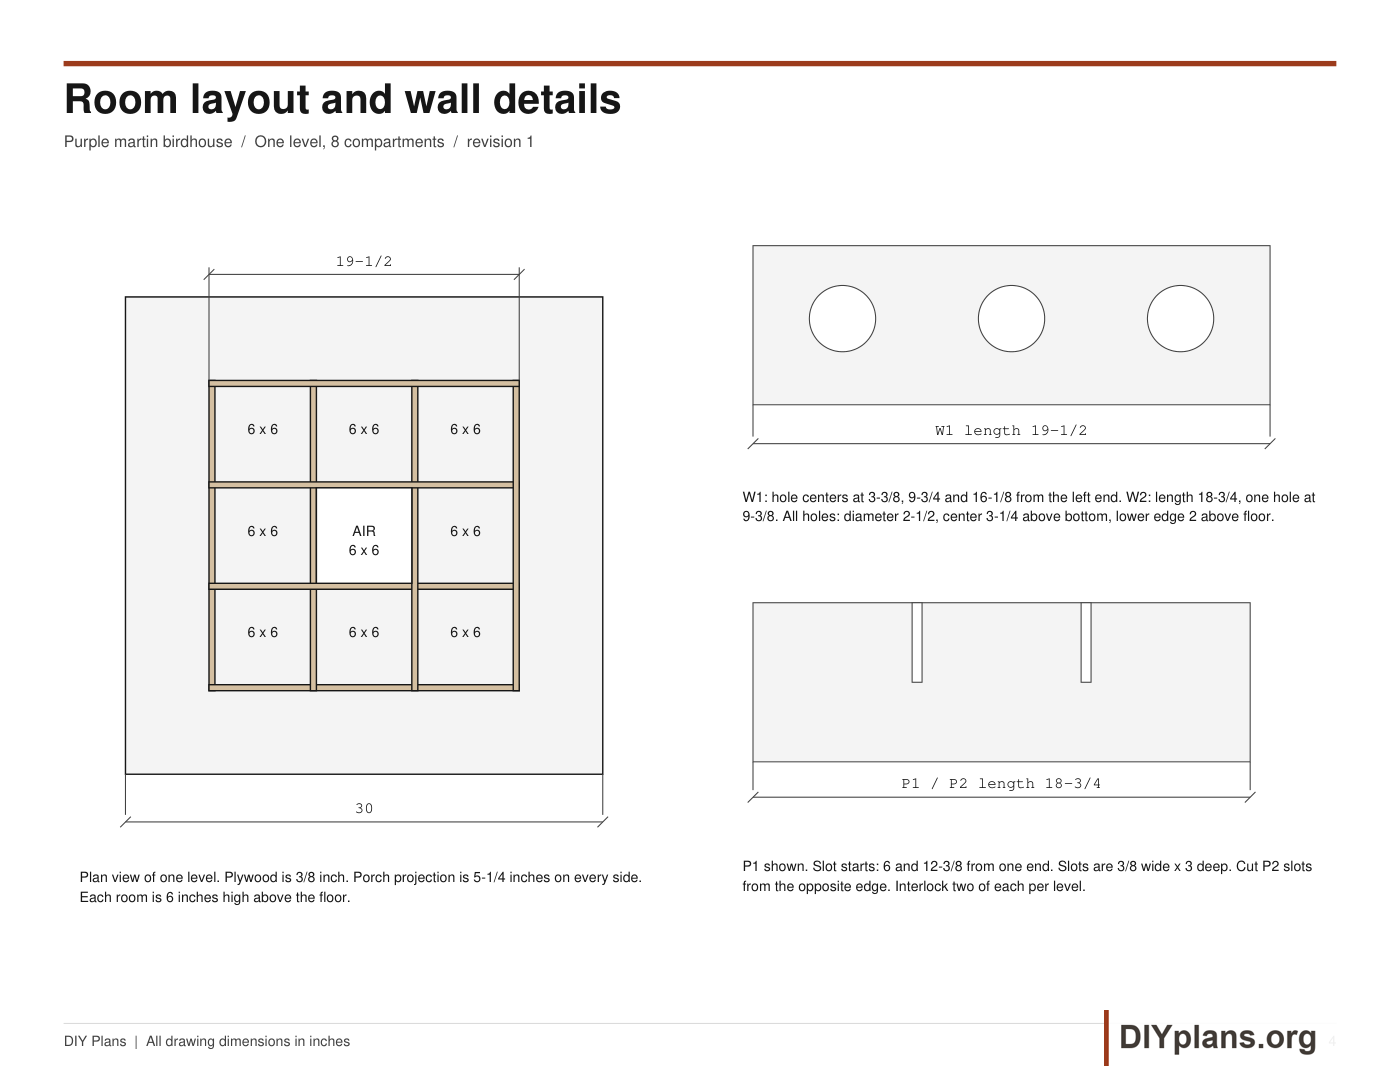
- Cut W1 at 19-1/2 x 6 inches. Cut W2, P1 and P2 at 18-3/4 x 6 inches. On P1 and P2, start the two slots 6 and 12-3/8 inches from the same end. Each slot is 3/8 inch wide and 3 inches deep. Cut P1 slots from the top and P2 slots from the bottom. Test the fit on scrap first; use the wall and partition drawing to check the layout.
Check: Walls and partitions dry-fit with matching 3/8-in-wide,3-in-deep half-laps.
Step 4 Drill the entrances
- Clamp a backing board behind every cut. W1 has three 2-1/2-inch holes centered 3-3/8, 9-3/4 and 16-1/8 inches from its left end. W2 has one hole centered 9-3/8 inches from its end. All centers are 3-1/4 inches above the bottom edge. Smooth splinters without enlarging the openings.
Check: Entrance holes are smooth,2-1/2 in in diameter and positioned at the shown centers.
Step 5 Assemble each level
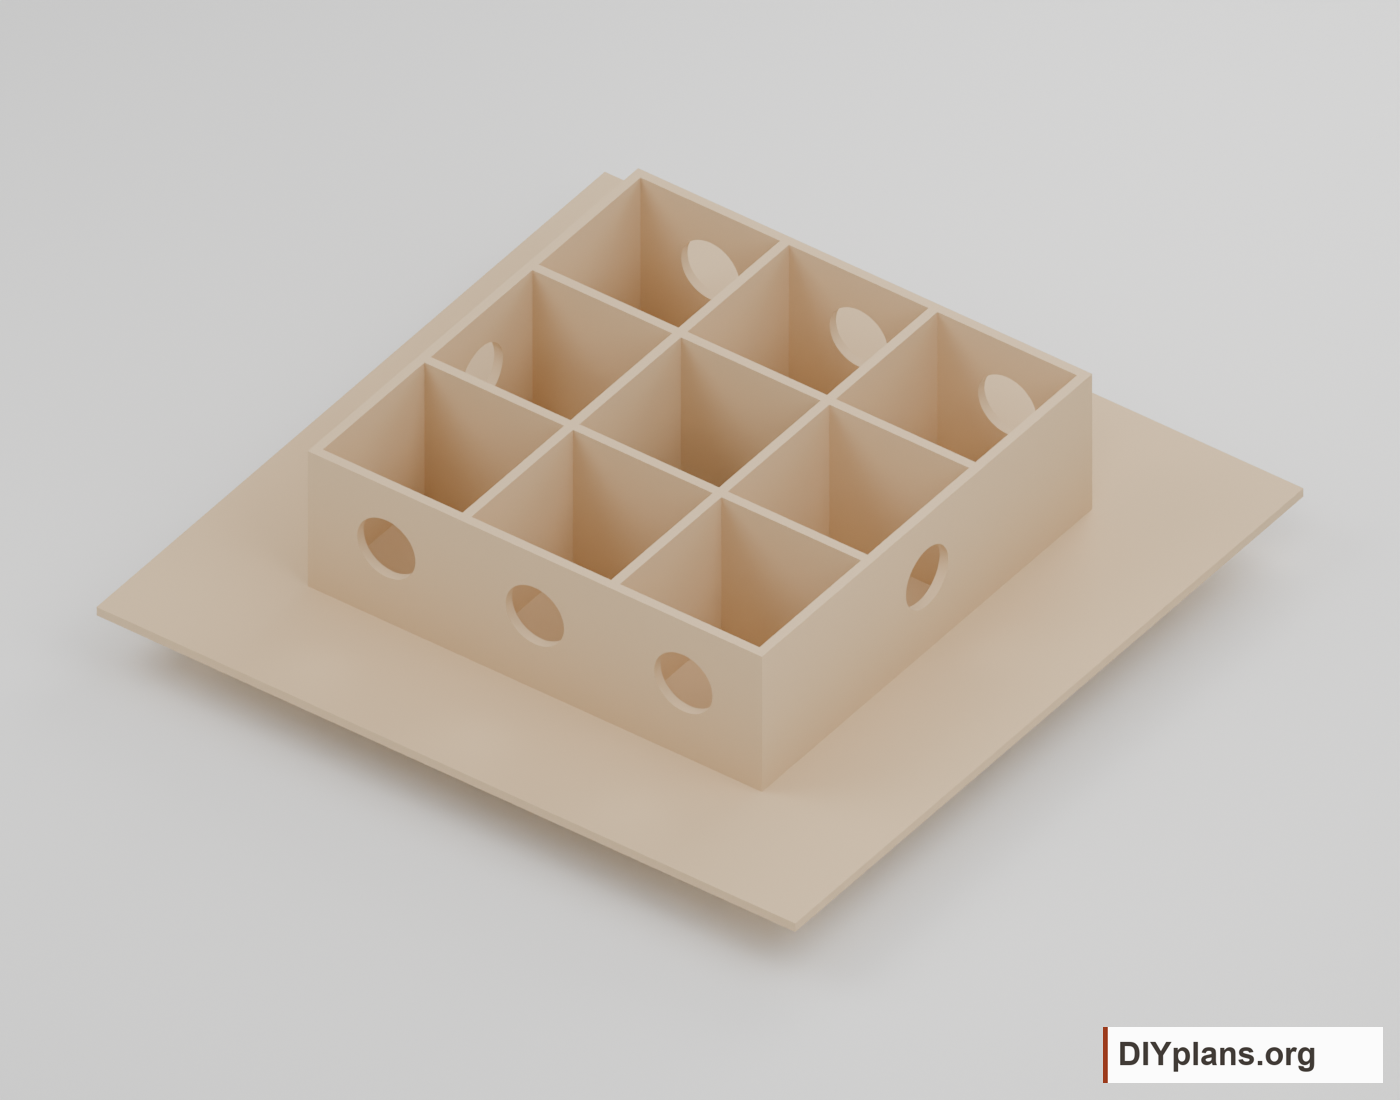
- Interlock P1 and P2 to form the center shaft and cross partitions. Butt the 18-3/4-inch side walls between the 19-1/2-inch front and back walls. Check all eight rooms and the center shaft for a clear 6 x 6-inch opening. Center the 19-1/2-inch square enclosure on its floor, leaving 5-1/4-inch porches. Use a trial assembly to select exterior adhesive or reinforcement molding and suitable fasteners.
Check: Each completed level has eight clear 6×6- in rooms and an unobstructed center shaft.
Step 6 Make the removable roof
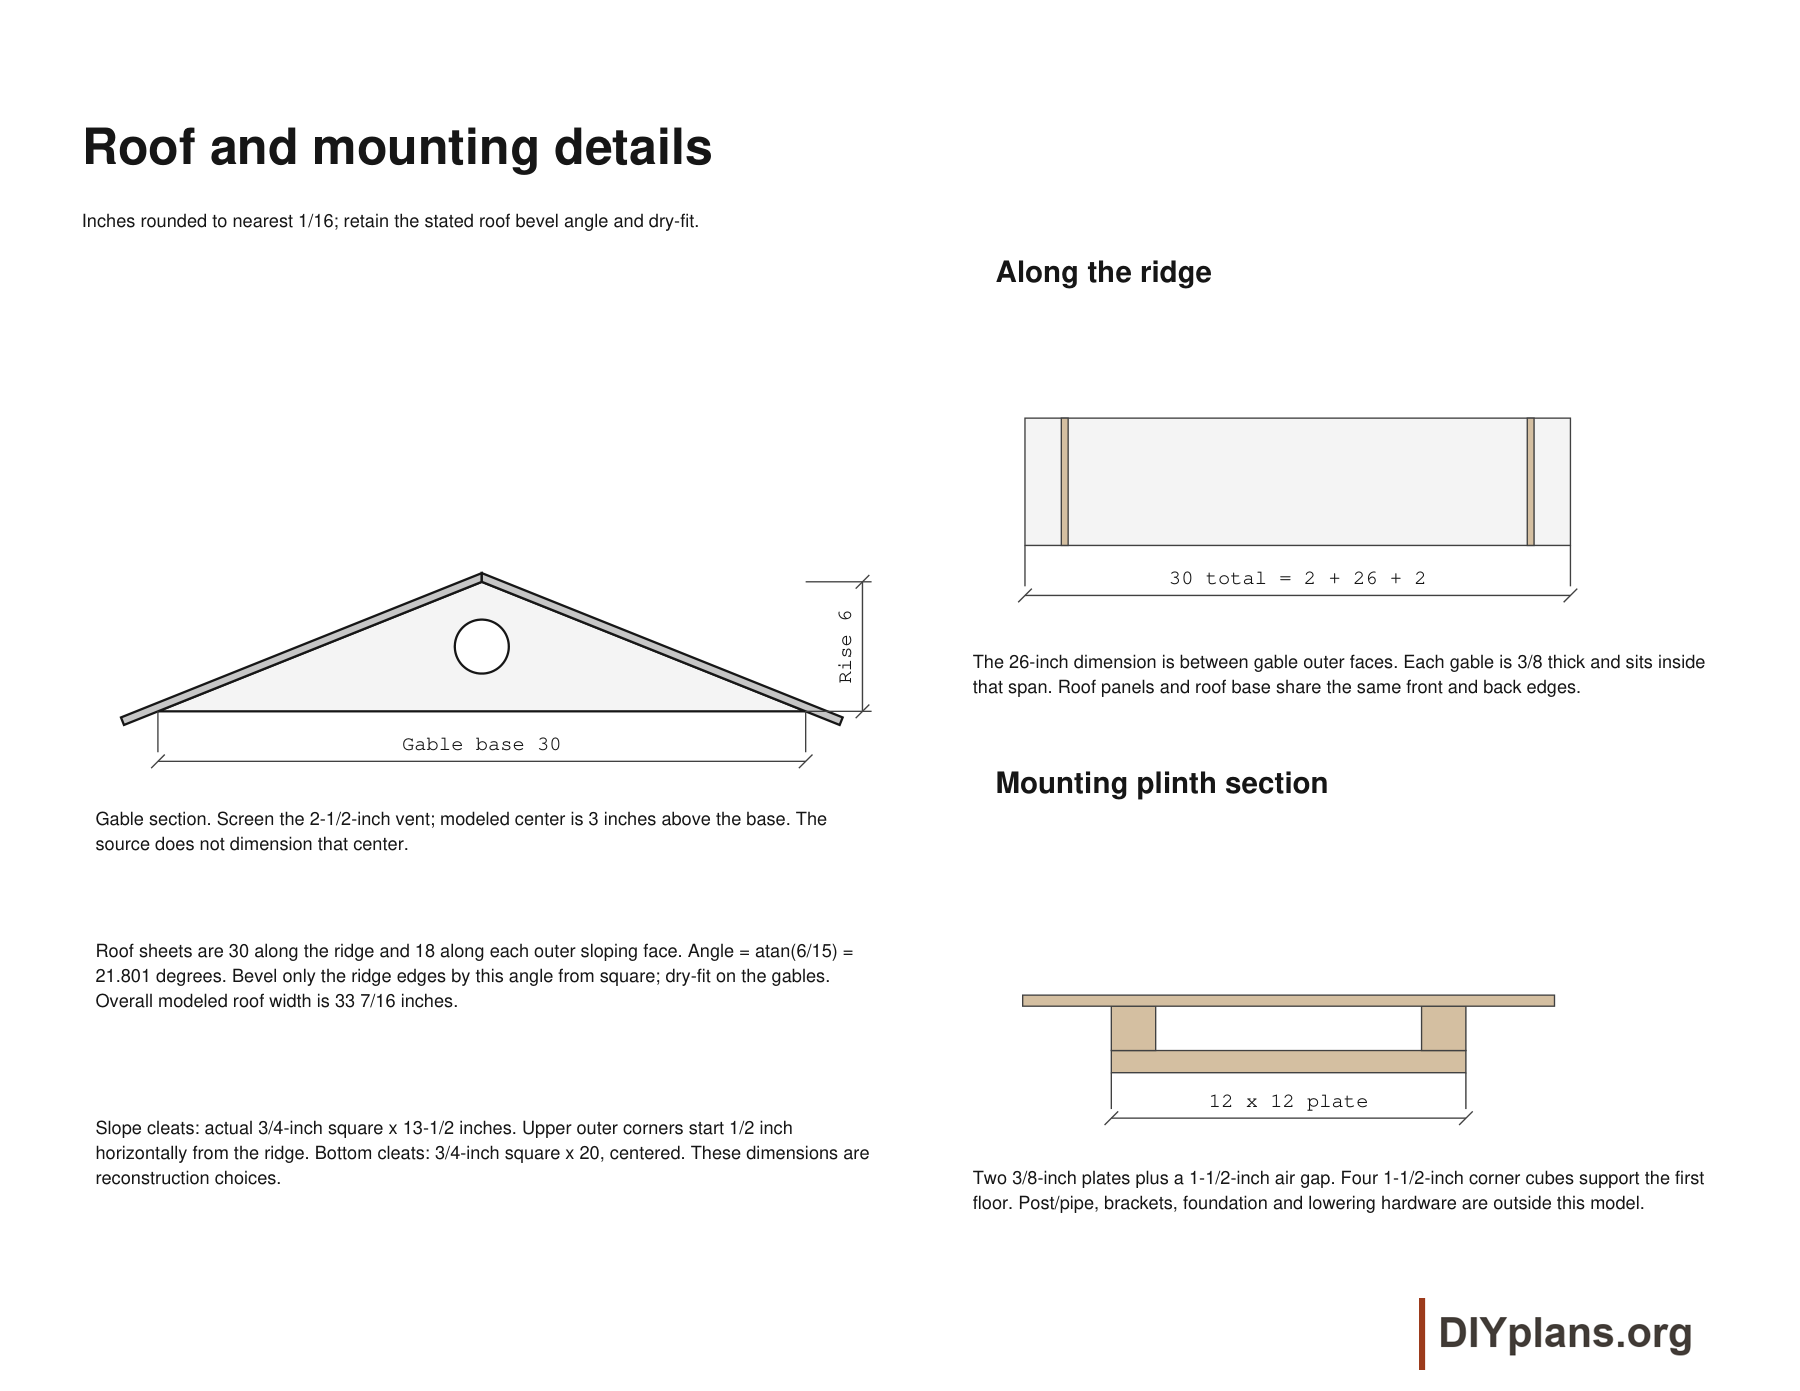
- Cut each G blank to a 30-inch base and 6-inch rise at the midpoint. Drill the 2-1/2-inch vent centered 15 inches across and 3 inches above its base. Fit screening inside each gable before closing the roof. Place the gable outer faces 2 inches from the roof-base front and back edges. Follow the roof and mounting drawing for the cleat and roof-sheet positions.
Check: Gables are positioned 2 in from roof-base ends and their vents have fitted screening.
Step 7 Fit the roof sheets and cleats
- Fit the four 13-1/2-inch slope cleats immediately inside the gables against the roof underside, with their upper ends 1/2 inch horizontally from the ridge. Center a 20-inch cleat along the inside bottom of each gable. Dry-fit both 30 x 18-inch roof sheets with their ridge edges beveled 21.801 degrees from square. Preserve the 18-inch outer face width. Select fasteners and an exterior sealing system suited to the plywood. Seal the ridge and exposed plywood edges.
Check: Both 18- in outer-face roof sheets dry-fit on the gables with a closed 21.801-degree ridge bevel.
Step 8 Build the ventilated mounting base
- Laminate the two 12-inch square plates into a 3/4-inch plate. Place a 1-1/2-inch cube at each corner, flush to the plate edges. Center this assembly below the first floor, leaving a 1-1/2-inch open air gap above the plate. Keep the center shaft and side air inlets unobstructed. Have the post connection sized for the house, mounting height and site loads.
Check: The laminated mounting plate and four spacer cubes leave a clear 1-1/2- in air gap.
Step 9 Fit and latch the removable roof
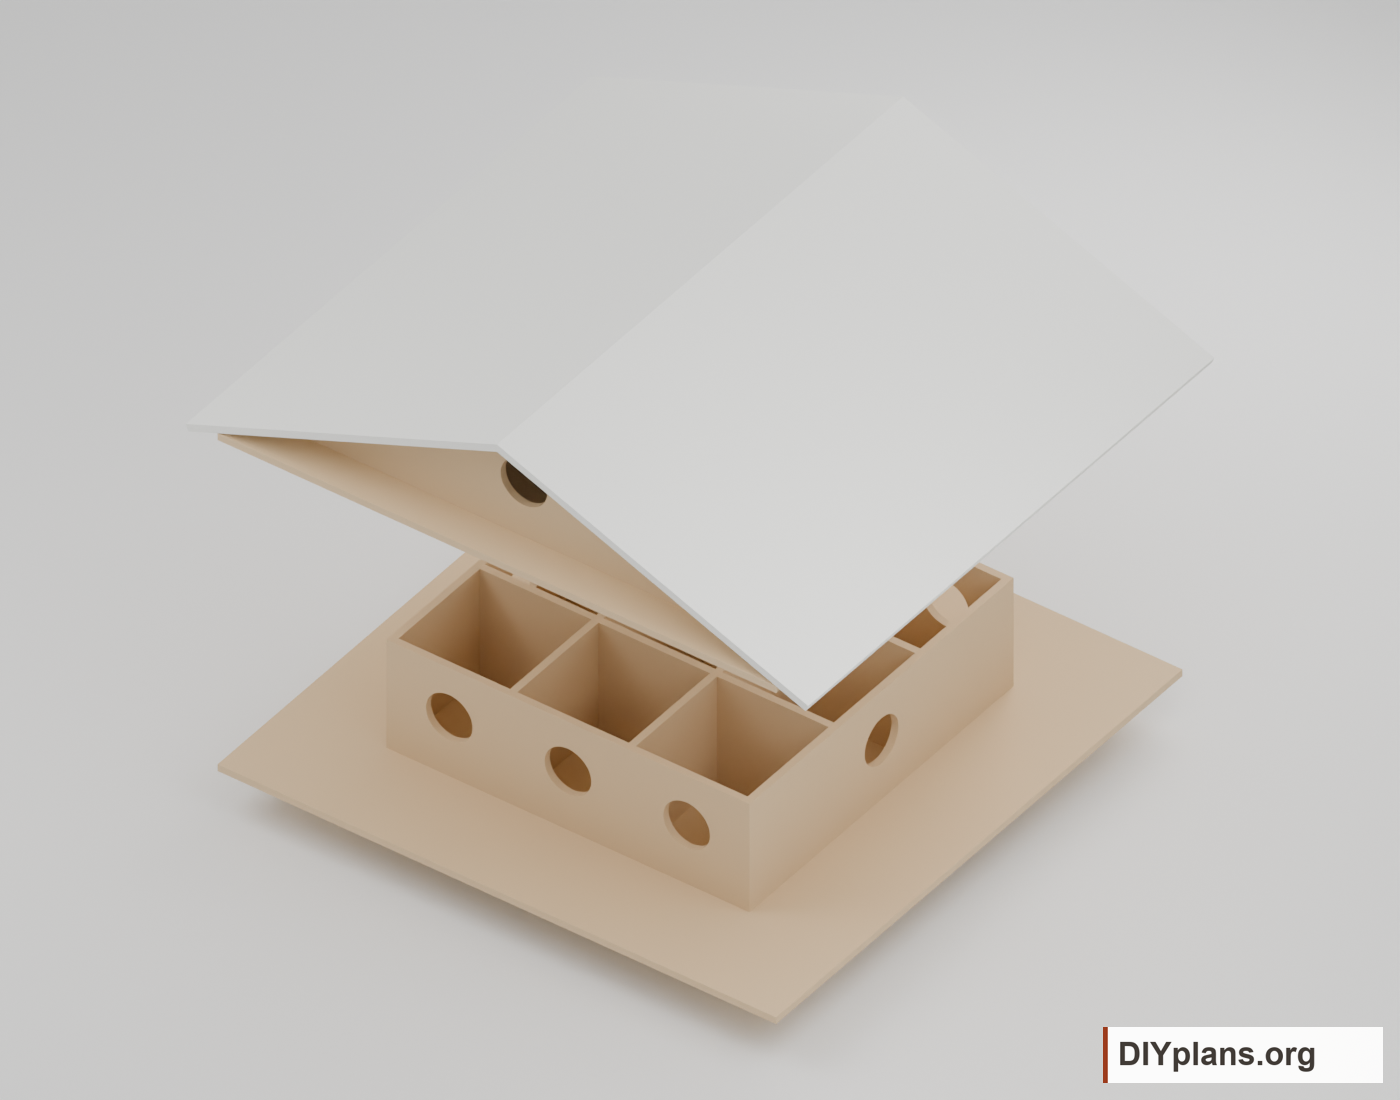
- Place the roof base directly on the walls and align the center openings. Fit four hook-and-eye sets with backing suited to the hardware. Keep the roof removable; do not glue this joint.
Check: Removable sections align with the center shaft and engage their fitted latches without glue.
Step 10 Mount the house and provide cleaning access
- Complete drainage, screening, fasteners, weather sealing and secure latching before outdoor installation. Before using a 4 x 4 post or 2-1/2-inch pipe at the suggested height of 15-20 feet, have the support, connections and footing designed for the site. Provide a lowering system or safe access to inspect and clean every compartment.
Check: Site-specific support, secure latches and safe access are complete before outdoor installation.
Sources
Based on the 1969 Purple Martin Birdhouse drawing hosted by North Dakota State University. Models, drawings and instructions by DIY Plans.